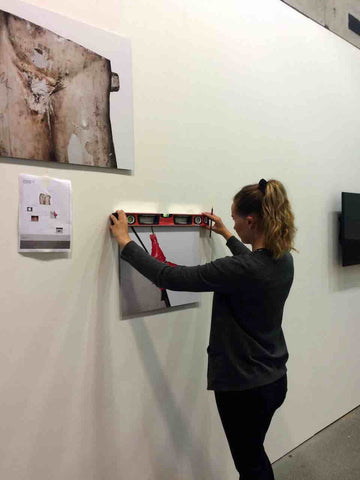
 In this article I will discuss how to package an artwork. Whilst I was studying Fine Art at Liverpool Hope University I volunteered in several galleries across Merseyside. During the several hundred hours of volunteer work that I did, I learnt everything from assembling an exhibition to constructing the visitor information for the gallery walls. One of the most important things that I learnt along the way was how to package an artwork properly. Whether an artwork is travelling across the globe or a mile down the road, protective packaging is a must to ensure it’s safety and quality. This is especially important during a gallery exhibition install.
Art Handling Gallery Standards
Some artworks are so valuable that they always travel with a human courier to ensure it’s safety in getting from A to B. Once the artwork is in the new gallery space, ‘condition forms’ have to be filled out, documenting any faults with the artwork’s condition. The same process is repeated when the artwork is returned to it’s original home at the end of the exhibition period.
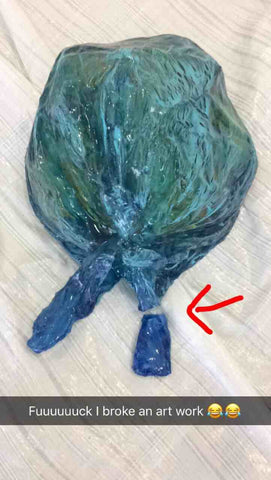
Excuse my obscene profanity - this was a Snapchat that I sent at the time of this blunder.
True story - I was once handling a heavy glass sculpture and it accidentally slipped from my hand.
SNAP!
A small section of it had broke off!
Whoops…
Anyway, art handling.
It can seem like a daunting task, but with simple instruction and practice you can learn how to package an artwork like a pro!
What ingredients do we need?
- Acid Free Paper
- Bubble Wrap - try to refrain from popping it…I know it’s addictively fun. Since writing this article several years ago I now use cardboard bubble wrap and paper tape in order to be more environmentally friendly.
- Double layer Cardboard Sheet / Cardboard Box
- Stanley Knife
- Ruler and Pen/Pencil
- Strong Packaging Tape (Fragile Tape too, if you want)
- Masking Tape
Each artwork requires different handling procedures depending on the medium it was created with, it’s weight and size, how old or fragile it is, and frankly, how important and valuable it is.
In this post I will talk about how I package MY art - all of which are made with either resin or acrylic paint.
To begin, make sure that both the space you’re working in and your hands are clean! The first step I take when handling an artwork is to check it for any faults. Because I always properly store my art in a protective environment, I have never had to rectify any imperfections. Issues that may need fixing could be a chipped edge that needs touching up with paint, for example.
Next, I lay down a protective layer of bubble wrap on the table surface that I will be working on. This provides a soft cushioning for the artwork whilst I am handling it.
Acid Free Paper
Following on from this I lay down a sheet of acid free paper. I use this because of it’s archival and protective qualities. If anything acidic comes into contact with an artwork it can cause slow damage and decay over time. Acid free paper is neutral in its PH levels. It also provides a protective barrier between the bubble wrap and the artwork.
As my Mum always says - prevention is better than cure.
Wrapping The Artwork
I then wrap the artwork in the acid free paper, sealing it with small tabs of masking tape. You don’t need loads of tape at this stage, so don’t go overboard.
Next, I place the paper wrapped artwork face down onto the smooth side of the bubble wrap. If the artwork is placed on the raised bubble side, there is a chance that the bubbles might leave an impression on the work.
I then wrap the artwork several times in bubble wrap, ensuring each area is thickly covered. If it is a particularly large or heavy artwork, say with a frame, I will add custom made ‘corners’ for added protection. I do this by folding extra bubble wrap around the edges.
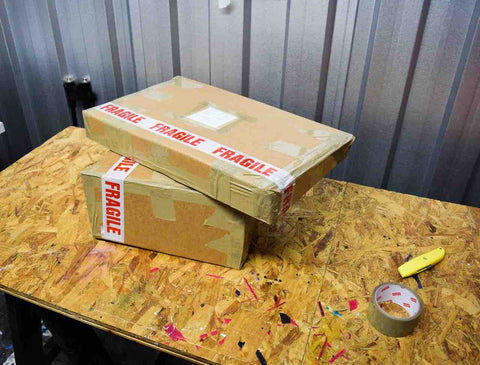
Generally I have to make a custom box for large artworks. I buy in pre-cut boxes for smaller items, just to make the packaging process quicker. But for larger items it’s better to make a custom sized box to ensure safe shipping.
In case you were wondering, I mainly buy my pre-cut boxes and cardboard sheets (double layer) from Kite Packaging. I also use ASC Direct for custom sized boxes.
Making A Box From Scratch
In the video above you can see me cutting out the basic shape for a box. Firstly I’ll mark out how big I need each section to be, and then using my ruler and Stanley knife, I cut away any excess. To create the seams of the box I’ll lightly run my Stanley knife across the cardboard. I can then easily bend the flaps along these creases.
This can be fairly time consuming when you’re new to it, but putting in this time and effort gives your artwork the perfect sized shipping container. When I first learnt how to package an artwork properly, it used to take me a good 40 minutes to create a custom sized box, whereas now, with plenty of practice under my belt, I can create one in less than ten minutes.
If you’re sending more than one artwork in the same box, place a piece of cardboard in-between the two pieces facing together. Personally, I don’t use or recommend the use of packing peanuts. They can ‘settle’ during transit, creating unwanted space in the box, and frankly, they’re just annoying for a customer to deal with. If there is any excess space in your parcel I recommend padding it out with thick bubble wrap.
When placing your artwork into the box, although it’s best to have a snug fit, make sure there is no pressure on the canvas. If anything is pushing onto the artwork it could cause it to warp and create indentations during transit.
Staying Green
In an attempt to be more environmentally friendly I reuse as much packaging materials as I can - it’s irresponsible not to. I regularly order items for my business off the internet, which always arrive in cardboard boxes. These boxes are generally still in excellent condition, so it’s an unnecessary waste to not reuse them. Packaging artworks is not an aesthetic exercise. I would much rather a package be safe and secure than look pretty. And in a world that is focused on becoming more green, I don’t think too many people would object to recycled packaging being used so long as their items arrived safely.
Assume Your Parcel Won't Be Handled with Care
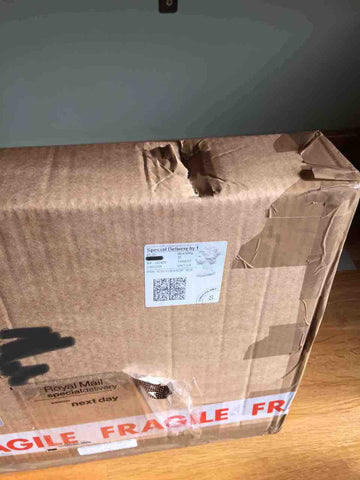
Issues can still occur even when you take every preventative measure though. About a year ago I was sent this image from a customer. Royal Mail had royally beaten up my poor box. Luckily, the artwork was unscathed - that’s all those bubble wrap layers for you!
Once the artwork is fitted snugly in your box it’s important to seal it up with strong packaging tape to ensure the contents are fully protected. Sealing the edges, especially the corners, reinforces the entire package. Just make sure to leave room for shipping labels!
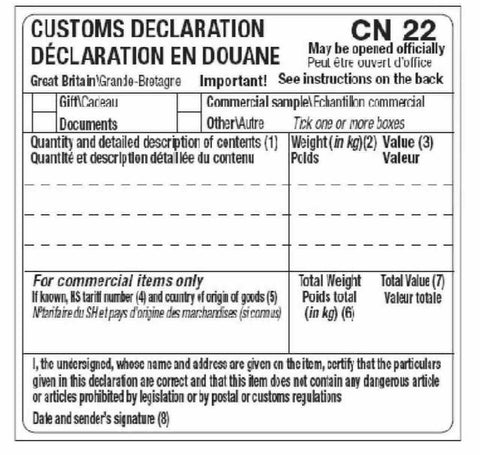
Customs Labels
When sending items outside of the European Union, customs labels are required. They are required to be placed in the bottom left hand side of your parcel. You generally have to provide a return address on the reverse of the parcel too (a house number and post code will suffice).
I generally always go with Royal Mail when posting orders. View RM price guide here.
However, if a parcel is too big or heavy (over 2kg), then it goes with ParcelForce. Still though, I’ve occasionally found that trying to send an item through the Post Office can be more costly than necessary.
So when those situations arise I’ll use Parcel2Go. This is basically the ‘Compare The Market’ website for posting services. I’ve gotten some pretty sweet deals using this site, and I’ve have had no issues with any of the courier services.
However, I won’t use the lowest price offer if I’ve never heard of the company before. I’m not willing to take a risk - cheapest isn’t always best.
Extra Tips for How to Package an Artwork:
- For an extra protective layer, wrap your artwork in a layer of polythene to create a fully waterproof seal.
- Handling an old or fragile piece of art? Wear clean white cotton gloves. This prevents the natural oils and fingerprints from your hands marking and damaging the artwork.
- For extra padding and support when wrapping a fragile artwork, lay down foam or a blanket to create a soft working surface. This protects the artwork from your hard table surface.
- You can put as much fragile tape on a package as you want, but you should always pack your artwork assuming that care won’t be taken of your parcel. Don’t assume it will be gently handled on it’s journey - it most likely won’t be. Your packaging should be sturdy enough that you feel confident you could drop your parcel from a metre in height and your artwork would still be safe and intact.
- It’s best to pay that little bit extra for insurance and tracking information when shipping an artwork. This will usually only be a few extra pounds, but it’s worth it for the peace of mind and security.
- Working with oil paint? Make sure the paint is FULLY DRY before wrapping it up. I have never worked with oil paint, purely because it takes WEEKS to dry. And to be frank, I lack that kind of patience.
- If you’re new to selling your art online and you’re unsure of how much shipping costs might be - DO NOT GUESS! I did this in my early days and I was stung on several occasions by underestimating shipping fees. Do a bit of research - it’s fairly quick and easy to gauge how much it will approximately cost to post anywhere in the world. I personally use the Royal Mail website and Parcel2go for all of my postage. If you’re still unsure, overestimate your shipping fees and you can always refund the overage to your customer.
- Got a piece that you’re really worried about being knocked around? Follow my packaging steps to box up your artwork. Then create a bigger box, pad it out with bubble wrap and place your smaller box, containing the artwork, inside it. That way, any knocks and bumps that happen will only damage the outer box, keeping your artwork safely intact.
- If it’s not obvious where to open your parcel, leave instructions for your customer detailing where about they should cut open the box. Nobody wants to accidentally slice through their canvas painting!
- DID YOU KNOW?! You can get free - yes FREE! - packaging supplies from Royal Mail? This has been one of my greatest discoveries. Just follow this link, create an account, and you can order relevant bits and bobs for your business.
Do you have any top tips, or best buys? Any advice that I’ve missed out? Leave a comment down below, let me know your tips and tricks for how to package an artwork!


2 comments
Great advice there indeed. But did you realise Royal Mail don’t insure art at all. You can still send with them but if it goes missing you will not be reimbursed. So upping the insurance is really pointless at the end of the day. All the best.
I am so grateful for this excellent post. I have contacted ASC Direct and ordered custom made boxes and for anything bigger I will follow these brilliant instructions. Thank you very much!